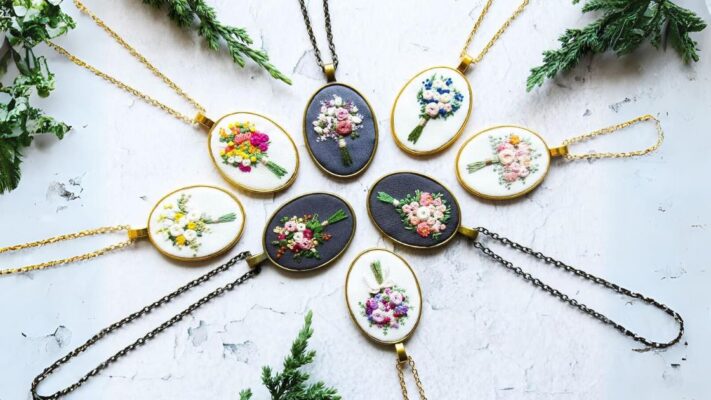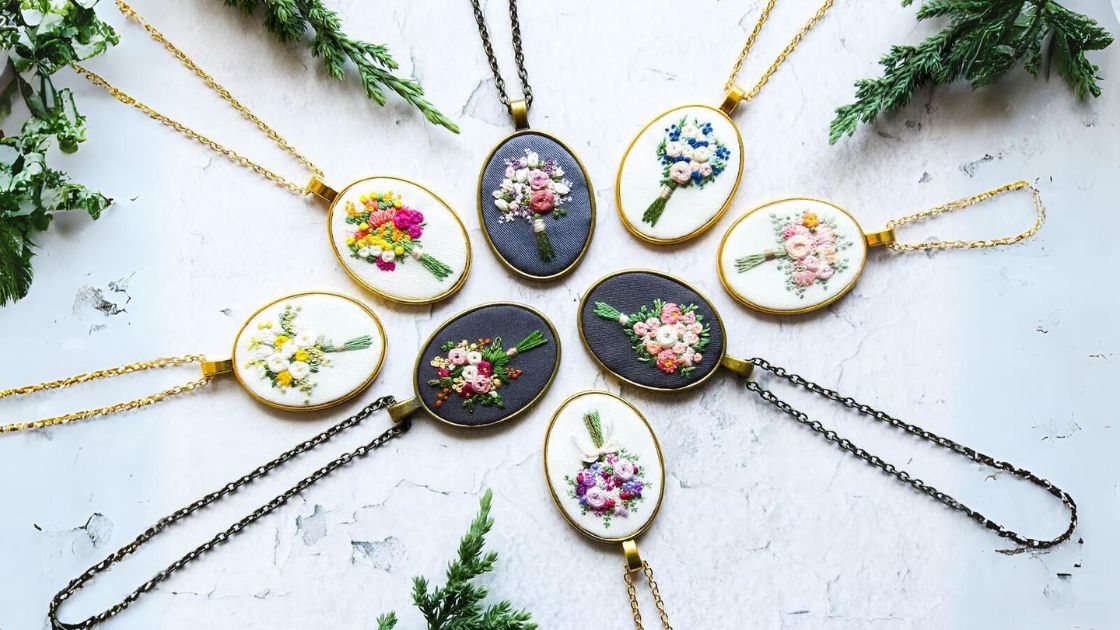
Hello, my creative readers! Today, I am thrilled to guide you through the process of crafting your very own Embroidered Necklace—a perfect blend of artistry and accessorizing that makes for a thoughtful and unique gift for your loved ones and friends. These necklaces, adorned with embroidered pendants, not only exhibit your creative prowess but also carry a personal touch, whether it’s a depiction of cherished memories, beloved pets, or simply something aesthetically pleasing.
Embroidered Necklaces are not commonly found in stores, making them all the more special. By mastering this craft, you might even stumble upon a new business opportunity. So, let’s dive into the creative process together!
Contents
- 1 Here’s What You’ll Need:
- 2 Step 1: Prepare Your Design
- 3 Step 2: Making The Pendant
- 4 Last Step: Complete The Necklace
- 4.0.0.1 How to Design Your Own T-Shirts: A Creative Guide
- 4.0.0.2 A Step-by-Step Guide To Design A Logo
- 4.0.0.3 5 Fonts For Elegance Wedding Invitations
- 4.0.0.4 6 Best Handwriting Fonts to Add Personal Touch To Your Designs
- 4.0.0.5 5 Tips To Improve Your Drawing Skills
- 4.0.0.6 How To Create An Embroidered Necklace: A Unique Gift Guide
Here’s What You’ll Need:
- A base fabric (preferably felt for its sturdy yet flexible nature)
- Iron-on interfacing to add structure
- Embroidery thread in assorted colors
- A bezel pendant setting
- An embroidery hoop for stability
- Embroidery needles (ensure they have a large enough eye)
- Scissors for trimming
- PVA glue for securing the pendant
- Chain or cord for the necklace
- Jump rings and a clasp for assembly

Step 1: Prepare Your Design
Begin by layering and ironing the felt to ensure thickness and stability. Secure the fabric within an embroidery hoop, being careful not to overstretch it, as this can distort the fabric. Sketch the desired pendant shape onto the fabric, ensuring accuracy in measurements.
Next, unleash your creativity by sketching out the design you wish to embroider. Whether it’s a scenic landscape or a whimsical pattern, let your imagination run wild. Select embroidery thread colors that complement your design, opting for bright or pastel hues to enhance visual appeal.
As you embark on the embroidery process, allocate ample time and consider enjoying some music or podcasts to make the experience more enjoyable. Remember to fill in all spaces diligently to ensure a polished finish.
Step 2: Making The Pendant
Once your embroidery masterpiece is complete, carefully remove it from the hoop and trim the excess fabric around the artwork. Press the piece with an iron to give it a softer appearance, and tidy up any stray threads for a clean finish.
Fold the excess fabric to the back of the piece and secure it with PVA glue. Apply a thin layer of glue to the entire back of the piece and the inner part of the bezel pendant setting. Take care not to overdo it, as excess glue can create a mess.
Attach the embroidered piece to the pendant setting, ensuring an even distribution of glue. Use a clothespin to secure them together, allowing ample time for the glue to dry thoroughly.
Last Step: Complete The Necklace
Once the glue has dried, thread the chain through the pendant’s hole to your desired length. Attach jump rings to both ends of the chain and add a clasp for easy wear. Voila! Your Embroidered Necklace is ready to adorn your neck or delight someone special.
Congratulations on crafting a one-of-a-kind Embroidered Necklace! The intricate details and personal touch make it a truly remarkable piece. If you have any questions or would like to share your creations, feel free to leave a comment below. We’d love to hear from you!
Thank you for joining us on this creative journey. Until next time, happy crafting!
Loveeee.
Related Posts
- Here’s Come Free Fonts For Commercial Use!
- Activities To Celebrate A Nation Of Diverse Readers
- 10 Disney Movies Surprisingly Are Not Available In Disney+