Are you tired of seeing the same old designs on t-shirts everywhere you go? Do you have a unique idea that you want to bring to life? Designing your own t-shirts can be a fun and rewarding experience that allows you to express your creativity and individuality. Whether you’re a seasoned designer or a complete novice, this guide will walk you through the steps to create your own custom t-shirts that reflect your personal style.
Contents
- 1 Step 1: Find Your Inspiration
- 2 Step 2: Choose Your Design Tools
- 3 Step 3: Create Your Design
- 4 Step 4: Consider Printing Options
- 5 Step 5: Test and Refine
- 6 Step 6: Bring Your Design to Life
- 7 Step 7: Share and Enjoy
- 7.0.0.1 How to Design Your Own T-Shirts: A Creative Guide
- 7.0.0.2 A Step-by-Step Guide To Design A Logo
- 7.0.0.3 5 Fonts For Elegance Wedding Invitations
- 7.0.0.4 6 Best Handwriting Fonts to Add Personal Touch To Your Designs
- 7.0.0.5 5 Tips To Improve Your Drawing Skills
- 7.0.0.6 How To Create An Embroidered Necklace: A Unique Gift Guide
Step 1: Find Your Inspiration
Before you start designing, take some time to gather inspiration. Browse through magazines, websites, and social media platforms for ideas that resonate with you. Pay attention to colors, patterns, and styles that catch your eye. Additionally, think about what message or theme you want your t-shirt to convey. Whether it’s a witty phrase, a striking image, or a bold graphic, having a clear concept in mind will help guide your design process. And for inspiration, visit our Facebook group SVGTrending – Free SVG Sharing & Sublimation, a community of design enthusiasts and a place to share their designs.
Step 2: Choose Your Design Tools
Once you have your inspiration, it’s time to choose the right tools for the job. Fortunately, you don’t need expensive software to design t-shirts. There are plenty of free and user-friendly options available online, such as Canva, Adobe Spark, or even basic drawing apps on your smartphone or tablet. Experiment with different tools to find the one that best suits your needs and preferences.
Step 3: Create Your Design
Now comes the fun part – bringing your vision to life! Start by sketching out your ideas on paper or digitally. Don’t worry about making it perfect right away; the goal is to get your ideas down on paper. Once you have a rough sketch, you can begin refining it and adding details. Experiment with different fonts, colors, and layouts until you’re happy with the final design.
If you’re not confident in your drawing skills, don’t be afraid to use pre-made elements or templates to help you get started. Many design software programs offer a wide range of graphics, icons, and fonts that you can use to customize your t-shirt design.
Step 4: Consider Printing Options
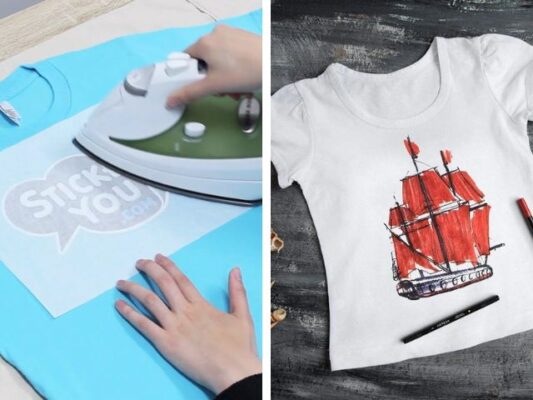
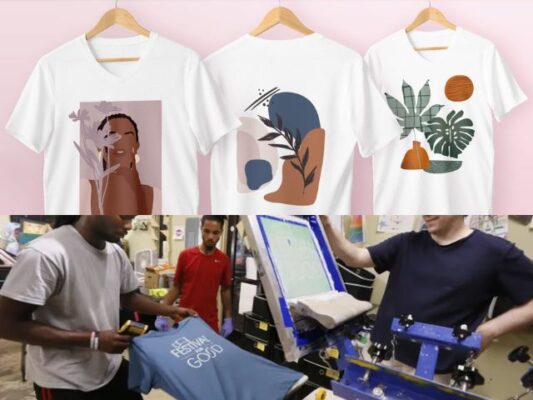
When it comes to printing your t-shirts, you have several options to choose from. If you’re only making a few shirts for personal use, you can use iron-on transfers or fabric markers to add your design to plain t-shirts. However, if you plan on selling your designs or making larger quantities, you may want to consider screen printing, heat transfer printing, or direct-to-garment printing. Each method has its pros and cons, so be sure to research your options and choose the one that best fits your budget and needs.
Step 5: Test and Refine
Before printing your final design, it’s essential to test it out to ensure that it looks good on a t-shirt. Print a sample or use a mockup template to see how your design will look in real life. Pay attention to details like sizing, placement, and color accuracy. If something doesn’t look right, don’t be afraid to go back to the drawing board and make adjustments.
Step 6: Bring Your Design to Life
Once you’re satisfied with your design, it’s time to bring it to life! Whether you’re printing your t-shirts at home or working with a professional printing company, be sure to communicate your vision clearly and provide any necessary files or instructions. Remember to order a few extra shirts for yourself and friends – after all, there’s nothing better than seeing your design out in the world!
Congratulations – you’ve successfully designed your own custom t-shirts! Now it’s time to show them off to the world. Wear your creations with pride, share photos on social media, and consider selling them online or at local markets or events. Who knows – your unique designs might just become the next big trend!
Designing your own t-shirts is a fun and creative process that allows you to unleash your imagination and express yourself in a unique way. Whether you’re designing for personal use or looking to start your own clothing line, following these steps will help you create custom t-shirts that are sure to turn heads and make a statement wherever you go. So what are you waiting for? Get started on your t-shirt design journey today!
Related Posts
- A Step-by-Step Guide To Design A Logo
- Activities To Celebrate A Nation Of Diverse Readers
- 10 Disney Movies Surprisingly Are Not Available In Disney+